
Can You Successfully Render Over Painted Brick A Complete Guide to Techniques and Tips
- Admin
- Dec 19, 2025
- 4 min read
Updated: May 12
Rendering over painted brick is a common question for homeowners and builders looking to refresh or protect exterior walls. Painting bricks can sometimes lead to peeling or flaking, and rendering offers a way to create a smooth, modern finish. But can you render over painted brick successfully? The short answer is yes, but it requires careful preparation and the right materials to ensure a durable, attractive result.
In this guide, I’ll walk you through the key steps and tips for rendering over painted brick, including how to handle flaking paint, pressure washing, priming, and choosing specialised products. Whether you’re tackling a DIY project or planning work with a professional, this post will help you understand what to expect and how to get the best outcome.

Why Render Over Painted Brick?
Rendering is a popular way to update brick walls because it can:
Hide imperfections and uneven surfaces
Provide a fresh, uniform look
Add an extra layer of protection against weather
Improve insulation when combined with the right materials
However, painted bricks present unique challenges. Paint can prevent the render from bonding properly, especially if the paint is old, flaking, or glossy. That’s why preparation is crucial before applying any render.
Assessing the Condition of Your Painted Brick
Before starting, inspect the brick surface carefully:
Look for flaking or peeling paint. Loose paint must be removed.
Check for mould, mildew, or dirt build-up.
Identify any cracks or damaged bricks that need repair.
Determine the type of paint used (latex, oil-based, etc.) if possible.
If the paint is firmly adhered and in good condition, rendering is easier. But if the paint is peeling or chalky, you’ll need to remove it or use special primers designed for painted surfaces.
Step 1: Removing Flaking Paint
Flaking paint will cause the render to fail quickly. To remove it:
Use a pressure washer with moderate pressure to blast away loose paint and dirt.
For stubborn areas, scrape with a wire brush or paint scraper.
Avoid damaging the brick surface while scraping.
Allow the wall to dry completely after washing.
Pressure washing is effective but requires care. Too much pressure can erode bricks or mortar. Aim for a balance that cleans without damage.
Step 2: Preparing the Surface
Once the loose paint is removed and the wall is dry:
Repair any cracks or holes with a suitable mortar or filler.
Flatten any rough patches to create a smooth base.
Remove dust and debris with a brush or vacuum.
At this stage, the wall should be clean, dry, and stable. This preparation ensures the render will stick properly.
Step 3: Priming Painted Brick
Priming is essential when rendering over painted brick because it improves adhesion and seals the surface.
Use a bonding primer designed for painted masonry.
Apply evenly with a roller or brush.
Follow the manufacturer’s drying time before rendering.
Primers help the render grip to the surface and prevent moisture from causing future peeling or cracking.
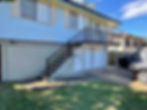
Applying bonding primer on painted brick wall before rendering
Step 4: Choosing the Right Render
Not all renders work well over painted brick. Consider these options:
Cement-based render: Traditional and strong.
Acrylic render: Flexible and adheres over a cement render base coat.
For painted brick surfaces, a high-adhesion render can be applied directly over a properly cleaned and prepared surface to ensure strong bonding.
Step 5: Applying the Render
When applying render over painted brick:
Use a scratch coat first. This thin base layer helps the final render stick.
Allow the scratch coat to cure as per instructions.
Apply the finishing coat smoothly with a trowel.
Work in manageable sections to maintain a wet edge and avoid lines.
Keep the render thickness consistent and in line with the manufacturer’s recommendations to help prevent cracking.
Step 6: Curing and Finishing
Proper curing is key to a strong render:
Keep the render moist for several days by misting with water.
Avoid direct sunlight or strong winds during curing.
Once cured, you can paint or seal the render if desired.
JT Industries & Co recommend using a Rockcote membrane to provide improved sealing and enhanced flexibility.
Common Problems and How to Avoid Them
Rendering over painted brick can fail if you skip steps or use the wrong materials. Watch out for:
Poor adhesion: Caused by unremoved paint or no primer.
Cracking: Due to thick render or fast drying.
Flaking render: From moisture trapped behind paint.
Taking time to prepare and using specialised products reduces these risks.
Final Thoughts on Rendering Over Painted Brick
You can successfully render over painted brick if you prepare the surface properly, remove flaking paint, use a bonding primer, and select the right Rockcote render type. Pressure washing and repairing the brick are essential first steps. High-adhesion renders usually perform best on painted surfaces.
If you’re unsure about the condition of your brick or the best products to use, consult a professional at JT Industries & co. Rendering is a great way to update your home’s exterior, but it requires care to last.
Ready to transform your painted brick walls? Start with a thorough inspection and cleaning, then follow the steps here for a smooth, durable finish that will enhance your home for years.